Frequently Asked Questions
I have updated to Windows 11 and now I cannot print my reports, or I can just print one page and it crashes Roof Wizard.
If you have updated to Windows 11 (either on purpose, or it did it automatically)and now you cannot print any reports, it is due to a bug in the new Windows 11 print dialog box. Some users have purchased a new PC to replace an old one, and the PC came with Windows 11, they have the same problem. It is specifically related to Windows 11 22H2 version - you can check the version by going to Settings in Windows. Windows 11 21H2 is OK.
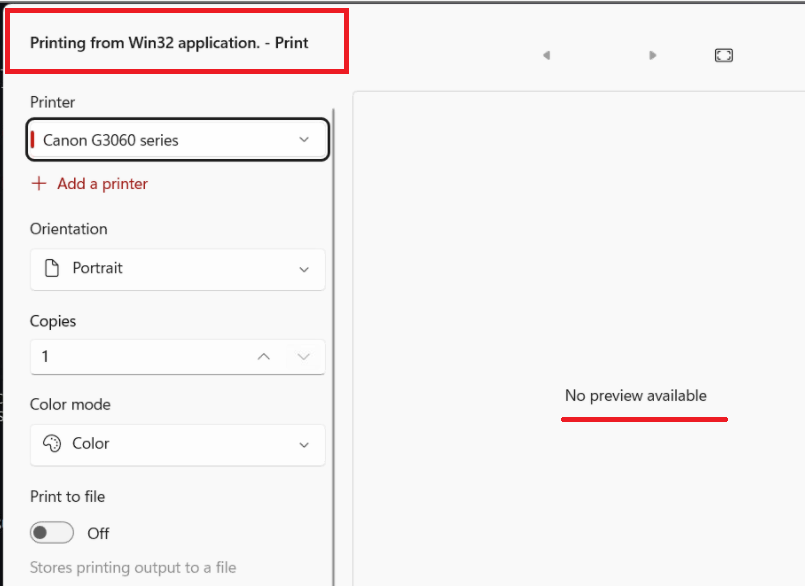
The new (broken) dialog looks like this, and reports that no preview is available.
There are many suggested fixes on the internet but not all of them have been found to work.
The most obvious thing to do is roll back the Windows 11 update to the previous version.
However, if you cannot do this, then you have another option.
You can force Windows to use the so-called 'legacy' print dialog, the one we have been using for years, by editing the Registry. You can try to force the change with the registry editor.
Close Roof Wizard; open up Notepad, copy and paste the following text (everything between the lines) to Notepad and save this to your desktop as 'PrinterFix.REG'
____________________________________________________________________________________________
Windows Registry Editor Version 5.00
[HKEY_CURRENT_USER\Software\Microsoft\Print\UnifiedPrintDialog] "PreferLegacyPrintDialog"=dword:00000001
____________________________________________________________________________________________
Close Notepad and find that file (PrinterFix.REG) on your desktop.
Right Click on the the file and select 'Run as Administrator' to run it.
This will throw up a dialog box warning that you are about to edit the Registry.
Click [Yes]. It applies the fix by modifying that record in the Registry for you.
You will (should) now have the old Print dialog and everything works as it used to.
However! More often than not, the security settings in Windows prevent that change from being applied and you have to manually edit the registry file.
If you find that you have to manually edit the Registry to add this key, add a new Registry record and the data for the record by carefully following these steps:
In the search bar, type [RegEdit] and the select [Enter]. This opens the Registry Editor.
(Please take care when editing the Registry, it is the foundation of the Windows operating system and you do not get a chance to select Save or SaveAs or anything. The changes you make are changed. If you are not sure, please ask an IT guy to help or call AppliCad.)
Navigate through to this record in the Registry,
HKEY_CURRENT_USER\Software\Microsoft\Print\UnifiedPrintDialog
Right click on that record and select [New] to add a new 'DWord' and in the area highlighted add the words 'PreferLegacyPrintDialog' (without the quote marks).

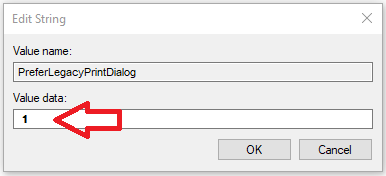
Then open the DWord by right clicking on the new DWord and select [Modify] and add the data value [1].
Select [OK], then [File > Exit].
The registry has now been modified to use the old style print dialog, the one that works!
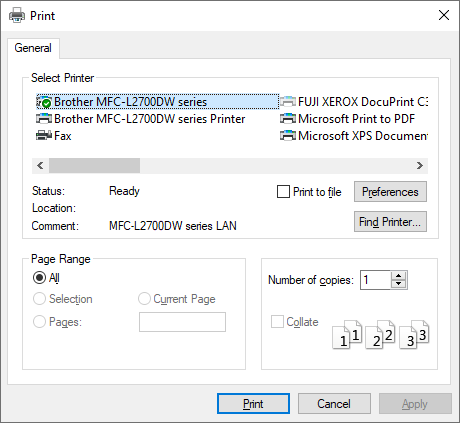
You should now have a Print dialog that looks something like this:
Please take care when editing the Registry, it is the foundation of the Windows operating system and you do not get a chance to select Save or SaveAs or anything. The changes you make are changed. If you are not sure, please ask an IT guy to help or call AppliCad.
This link has more the details on how to do this and many thanks to the publishers of this advice.
https://www.winhelponline.com/blog/restore-legacy-print-dialog-windows-11/
END
back